ReturnGO’s Return Portal is an add-on to your online store that allows shoppers to submit return requests while being guided by your Return Policy. There are different ways to embed the Returns Portal within your store. All of them are based on the Returns Portal URL.
This article explains what is the Returns Portal URL, how it is defined, and how you can change it.
What is the Return Portal URL?
Because the returns portal is an add-on to your online store, it has to use Shopify’s App proxy.
The App proxy defines the location of the portal in your store and allows communication between your store admin and ReturnGO account for information required for the returns portal operation, such as order data, inventory data, policy rules, etc.
The App proxy defines two parameters in the Return Portal URL:
- App prefix - can be a, app, tool, or community
- App name - one phrase with no spaces or special characters
So, the Return Portal URL is
https://[Your_Store_domain]/[App_prefix]/[App_name]
When you install ReturnGO, the default App proxy is https://[Your_Store_domain]/a/return
- App prefix = a
- App name = return
Why would you need or want to change the default URL?
It could be one or more of the following reasons:
- You use a different App proxy for other apps and want all of them to use the same app proxy.
- You want to give a different name to your returns portal.
- You already have a returns app before and its portal already uses the name “return”.
Changing the App proxy
As mentioned before, the App proxy is a Shopify definition. Therefore you can change it in your store’s admin interface.
However, it is crucial that you will update the app proxy in ReturnGO as well.
You can easily change your Return Portal URL by following the steps outlined below:
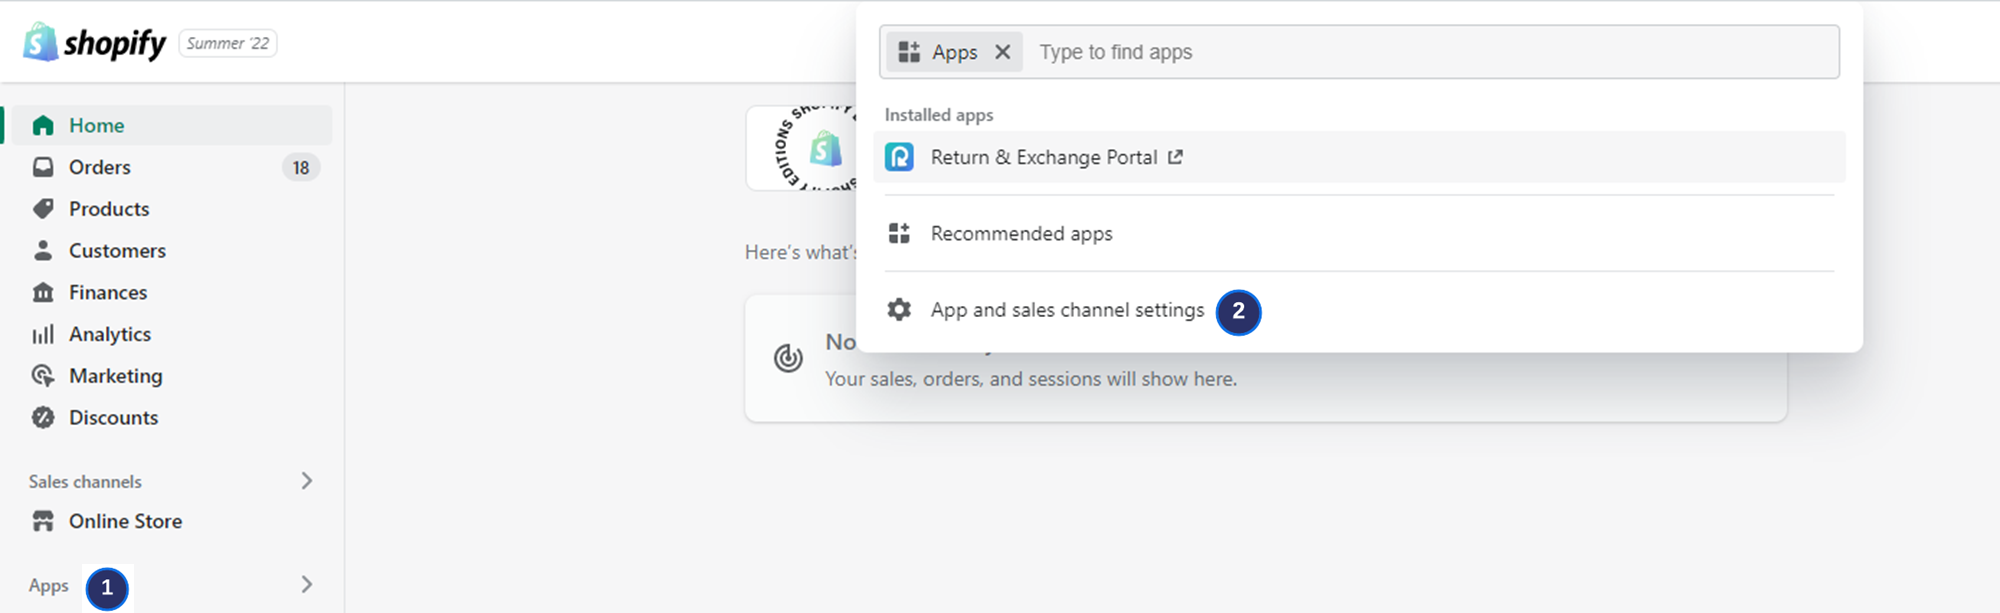
1. From your Shopify dashboard, go to Apps, click on App and sales channel settings.
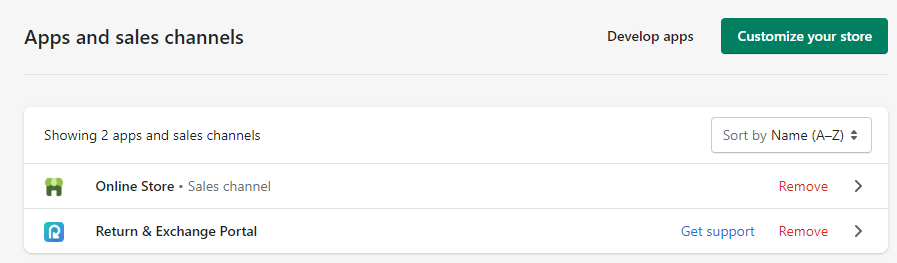
2. From Apps and sales channels, choose Return & Exchange Portal.
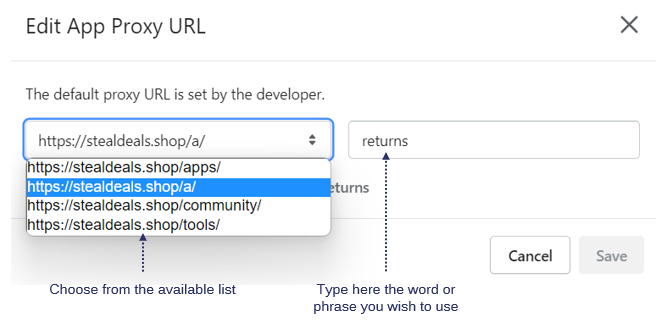
3. Click on Customize URL
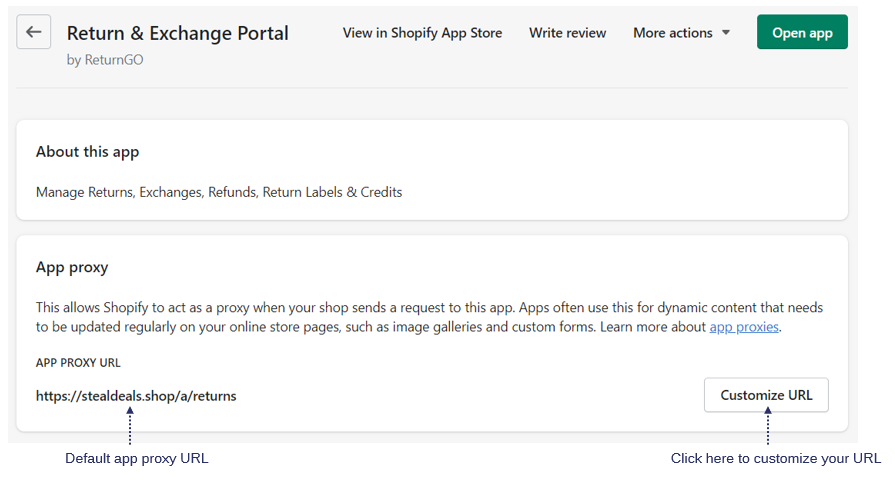
3. Choose from the dropdown list which proxy URL you wish to use and replace the word "returns" with your preferred word or phrase, e.g., "return", "return portal" etc.
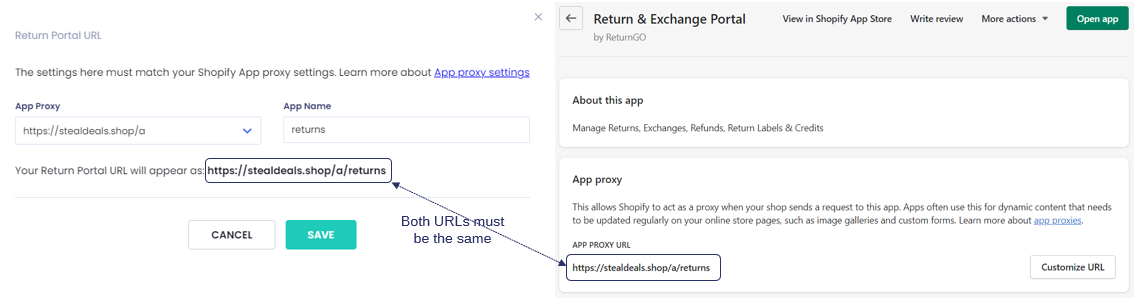
4. Update the new URL in RETURNGO > INTEGRATION under Shopify Integration and click on CUSTOMIZE URL under Return Portal URL Settings. Make sure to update the App Proxy and App Name as you've set them on Shopify.
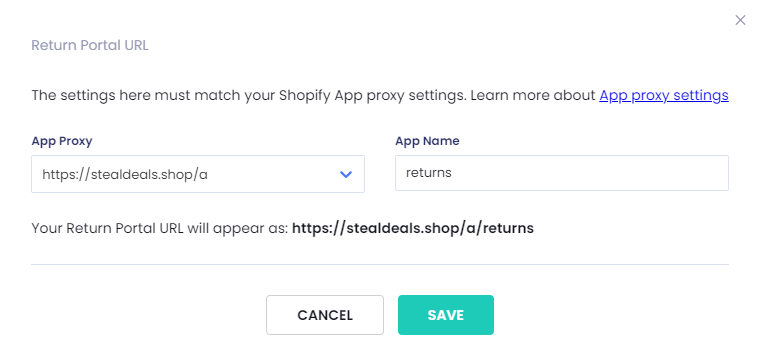
5. Lastly, make sure that both URLs are the same on Shopify and ReturnGO.